Cleaning your cat’s ears is an essential part of their grooming routine. Regular ear cleaning helps prevent infections, wax buildup, and other ear-related issues. This guide will provide you with detailed steps and tips on how to safely and effectively clean your cat’s ears.
1. Understanding the Importance of Ear Cleaning for Cats
Why Clean Your Cat’s Ears?
Cats are generally good at grooming themselves, but they can’t reach their ears effectively. This can lead to wax buildup, dirt, and even infections. Regular ear cleaning can help:
- Prevent infections caused by bacteria and yeast.
- Detect early signs of health issues.
- Keep your cat comfortable and happy.
Signs Your Cat Needs Ear Cleaning
Look for the following signs that may indicate your cat’s ears need attention:
- Foul odor from the ears.
- Excessive scratching or pawing at the ears.
- Redness or swelling inside the ear.
- Unusual head shaking or tilting.
2. Gather Your Supplies for Cleaning Cat Ears
Essential Tools and Products
Before you begin the ear cleaning process, ensure you have the following supplies:
- Cat Ear Cleaner: Choose a veterinarian-recommended ear cleaning solution.
- Cotton Balls or Gauze: Avoid using cotton swabs, as they can push debris further into the ear canal.
- Towel: To keep your cat comfortable and to catch any mess.
- Treats: To reward your cat and make the process positive.
Choosing the Right Ear Cleaner
Select an ear cleaner specifically designed for cats. Avoid using alcohol-based products, as they can irritate the sensitive skin inside the ear.
3. Preparing Your Cat for Ear Cleaning
Creating a Calm Environment
Choose a quiet space to perform the ear cleaning, free from distractions. A calm atmosphere helps keep your cat relaxed.
Handling Your Cat Safely
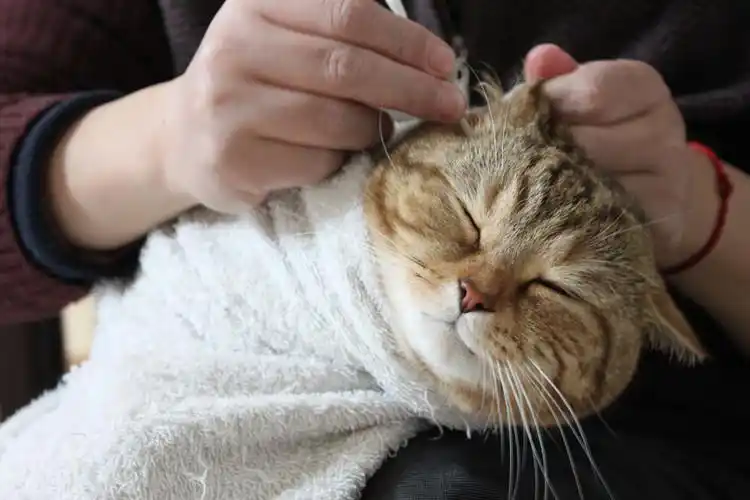
If your cat is nervous, consider having a second person assist you. Here’s how to handle your cat effectively:
- Wrap Your Cat: Gently wrap your cat in a towel, leaving only their head exposed. This can prevent sudden movements.
- Talk Softly: Speak to your cat in a soothing voice to reassure them.
4. Step-by-Step Instructions for Cleaning Cat Ears
Step 1: Inspect the Ears
Before cleaning, take a moment to inspect your cat’s ears. Look for signs of wax buildup, redness, or discharge. If you notice anything concerning, consult your veterinarian before proceeding.
Step 2: Apply the Ear Cleaner
- Hold the Ear Flap: Gently lift the outer ear flap to expose the ear canal.
- Apply the Cleaner: Squeeze a few drops of the ear cleaning solution into the ear canal. Be careful not to touch the tip of the bottle to your cat’s ear to avoid contamination.
Step 3: Massage the Base of the Ear
- Massage Gently: After applying the cleaner, gently massage the base of your cat’s ear for about 20-30 seconds. This helps the cleaner break down wax and debris.
Step 4: Let Your Cat Shake
- Let Them Shake: Allow your cat to shake their head naturally. This helps dislodge any loosened debris.
Step 5: Wipe the Ear
- Use Cotton Balls: Take a cotton ball or gauze and gently wipe the visible parts of the ear, including the inner flap. Do not insert anything into the ear canal.
Step 6: Reward Your Cat
- Give Treats: After cleaning, reward your cat with treats and praise. This positive reinforcement helps them associate ear cleaning with a pleasant experience.
5. Frequency of Ear Cleaning
How Often Should You Clean Your Cat’s Ears?
The frequency of ear cleaning depends on your cat’s breed, lifestyle, and any underlying health conditions. Generally, it’s advisable to clean your cat’s ears:
- Once a Month: For most cats, monthly cleaning is sufficient.
- More Often for Certain Breeds: Cats with long ears or those prone to ear infections may require more frequent cleaning.
Signs You Should Clean More Often
If you notice excessive wax buildup or odors between cleanings, it may be time to clean your cat’s ears more regularly.
6. Common Mistakes to Avoid When Cleaning Cat Ears
What Not to Do
- Avoid Cotton Swabs: Never use cotton swabs inside the ear canal, as this can push debris further in or damage the ear.
- Don’t Use Alcohol: Alcohol-based cleaners can irritate the sensitive skin in the ear.
- Don’t Rush the Process: Take your time and be gentle to ensure your cat remains calm and comfortable.
7. When to See a Veterinarian
Recognizing Signs of Infection
If you notice any of the following signs, it’s essential to seek veterinary care:
- Persistent foul odor.
- Discharge that is brown, yellow, or bloody.
- Swelling or redness in the ear canal.
- Severe scratching or shaking of the head.
Regular Check-Ups
Incorporate ear checks into your regular veterinary visits to ensure your cat’s ears remain healthy.
Conclusion
Cleaning your cat’s ears is an essential part of their grooming routine. By understanding the importance of ear cleaning and following the proper steps, you can help keep your cat comfortable and healthy. Always consult your veterinarian if you have concerns about your cat’s ear health, and remember to make ear cleaning a positive experience for your furry friend.
Comments (0)